on Drafting Film
Hello Fellow Artist! 🎨
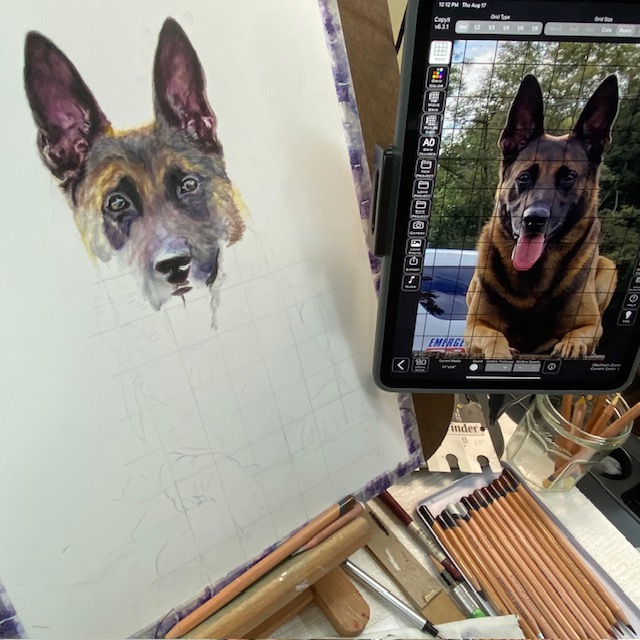
👉 Just a quick update on the progress of Falco, the German Shepherd memorial pet portrait 💙
I’m learning a lot with this pet portrait!👏
I can see why pet portrait artists love using Drafting Film ✍️
❀ What I’m Liking About Drafting Film:
- Vibrant Colors:
Unlike traditional papers, drafting film is non-absorbent, preserving the vibrancy of your colored pencil pigments and maintaining sharp details. The smoothness enables seamless blending and layering techniques, resulting in stunning, smooth gradients. - Excellent Erasability:
Not only for mistakes but it’s the best way to create highlights, whiskers, and fur detail. Drafting film allows for easy erasing and lifting off of colored pencil marks, giving you the freedom to make adjustments or refine details. - Only need 3-4 Layers of Colored Pencils:
I have found that a light application of the first few layers creates so much more coverage than with cotton paper. The colors blend on the film and again, they’re more vibrant so definitely use a scratch piece to test out your colors first. - Ideal for Detailed Artworks:
If you enjoy creating artworks with intricate details and precise lines, drafting film is an excellent option. The smooth surface allows for better control over your colored pencils, enabling you to achieve fine lines, subtle textures, and intricate patterns with ease. This makes drafting film particularly appealing for artists who specialize in hyperrealism or highly detailed renderings, such as pet portraits.
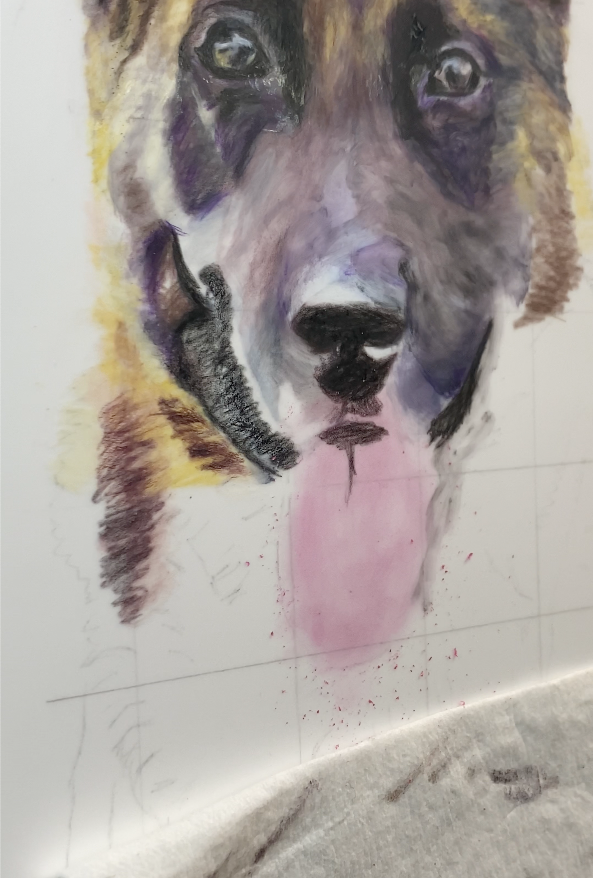
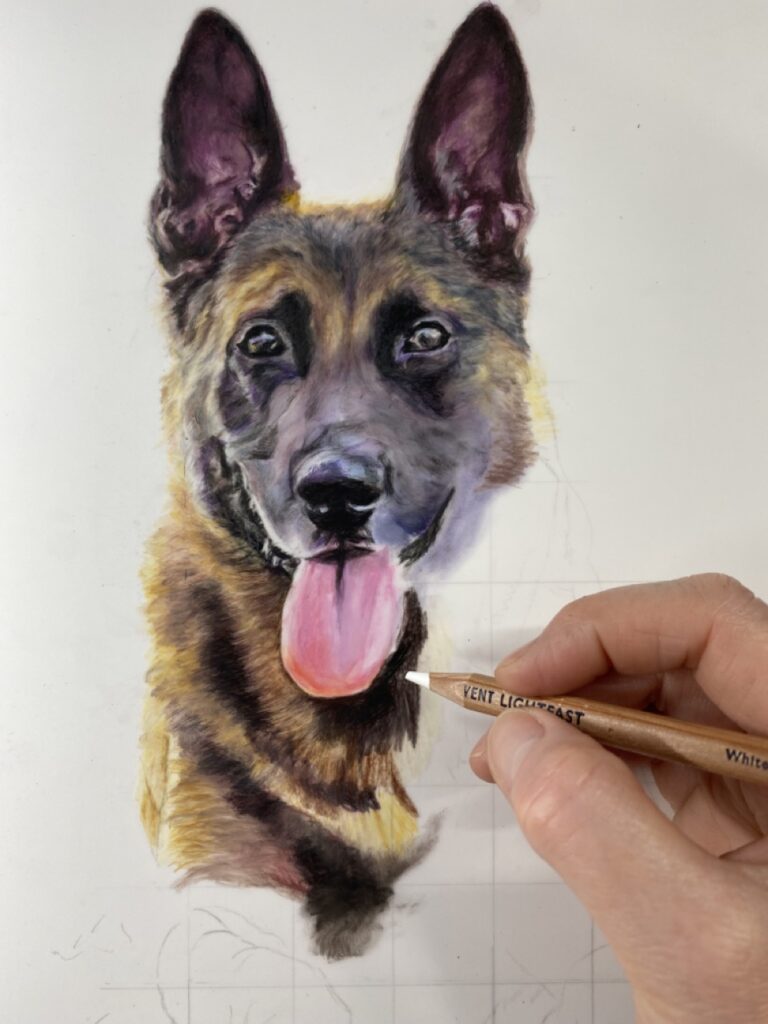
I’m blending shavings of colored pencil on drafting film for his tongue. To see the 30 minute YouTube tutorial click here! 🔴
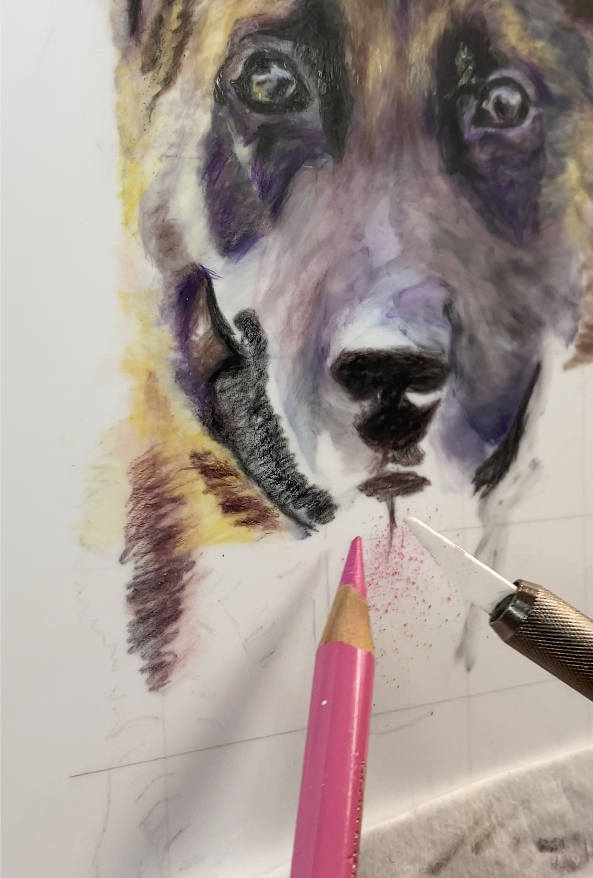
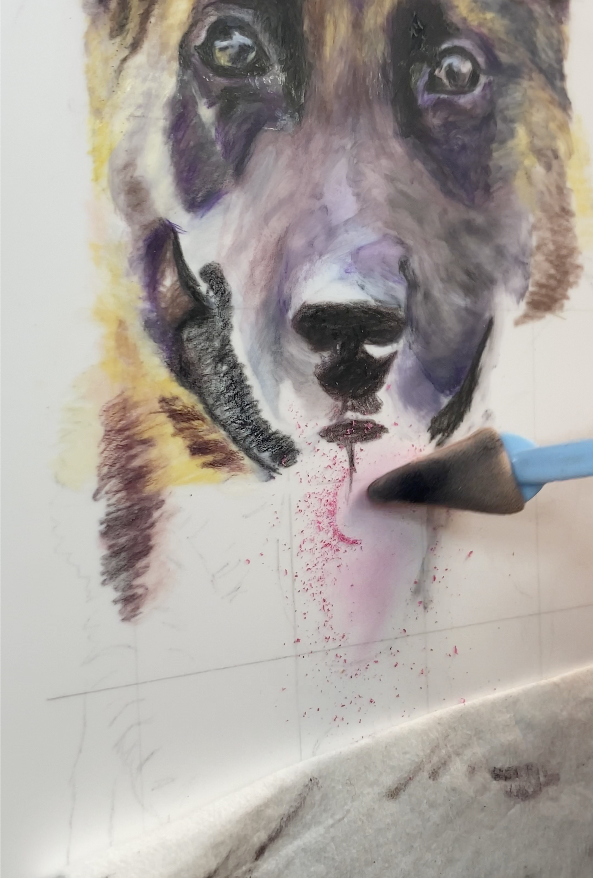
Slice Tool Technique for Creating Fur! 🔪Coming Soon!
✣ Cons of Using Drafting Film:
1. Lack of Tooth:
One of the drawbacks of drafting film is its smoothness, which means it lacks the tooth or surface texture found in traditional papers. The absence of tooth can make it challenging to build up multiple layers.
2. Learning Curve:
Give it three shots. The first time I tried Dura-Lar which is not the same thing at all. (see below).
Then once I tried drafting film I saw how vibrant the colors are and that I covered so much of my subject in such little time, I was intent on practicing and learning some techniques.
👉 Dura-Lar is not the same as the drafting film that I’m using in the photos. I’m using Grafix Double sided matte drafting film. I’ve found that Dick Blick’s has the best prices and choices of sizes to choose from (not sponsored). 🌻
More about the difference of the two in my blog post here
Today’s Summary :
For me, using drafting film for pet portraits is a no-brainer for me because of the time-saver it creates.
📣 I’m in the process of creating a Mini-Lesson of this drawing of Falco; How to use Colored Pencils on Drafting Film. As a thank you for all your support, I’m offering this lesson at a crazy price! Check it out here! 🔴
Thanks for visiting my blog I hope it was helpful for you! Please comment and let me know your experiences with drafting film. 🤗
Happy Drawing, Fellow Artists!
Molly 🌻
🎨 P.S. If you’d like more colored pencil techniques plus watercolor techniques, Join me on my Patreon Page! Patreon.com/MollysFineArt
📣 June discounts on all courses! Molly’s Blueprint Beginner’s Colored Pencil Course-Every Colored Pencil technique you need to know plus more! 🔴